
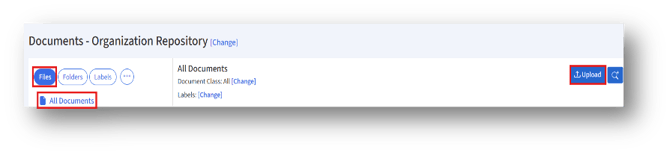
To upload a document under the Files tab, go to the “All Documents” section to upload a single file, or use the “Uploaded” section to add multiple files.
1. Clicking the “Upload” button will open the “Upload Document” page.
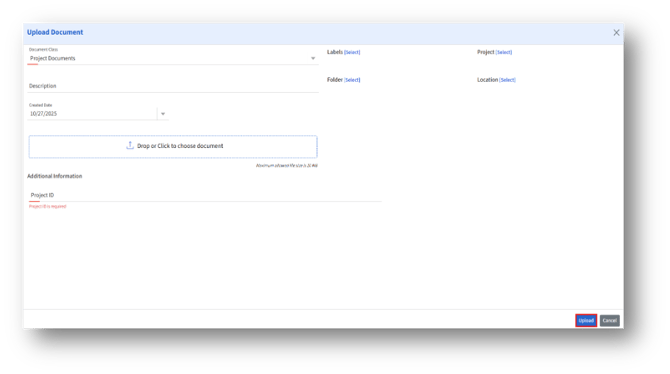
Enter the following details:
| Field Name
|
Description |
|
Document Class* |
Select the document class from the drop-down options. |
|
Description
|
Enter the document description. |
|
Created Date |
Select the date from the drop-down calendar. |
|
Drop or Click to Choose Document |
The section where you can upload a file. You can drag and drop a file or click to browse and select. |
|
Labels [Select] |
Clicking the Select button allows you to tag or categorize the document with predefined labels. |
|
Project [Select] |
Clicking the Select button allows you to link the document to a specific project. |
|
Folder [Select]* |
Clicking the Select button allows you to specify the folder or directory where the document will be stored. |
|
Location [Select] |
Clicking the Select button allows you to associate the document with a specific site or location. |
|
Additional Information |
Displays the set Metadata fields. |